Blog
PyRx Tutorial for Molecular Docking: A Step-by-Step Beginner’s Guide
If the command line is the thing standing between you and your first docking run, PyRx removes it. It wraps the same AutoDock Vina engine that researchers use into a point-and-click interface, so you can prepare molecules, set up a job, and read results without typing a single command. For a student running a first docking project, that lower barrier is the whole point.
PyRx is a free graphical front-end that runs molecular docking without the command line. You load your protein as a macromolecule, import and energy-minimise your ligands through Open Babel, launch the Vina Wizard, draw a grid box around the binding site, and run AutoDock Vina — PyRx returns ranked binding affinities in a results table.
This tutorial walks through the whole PyRx workflow in order, explains what each step is actually doing, and shows you how to read the output. It assumes your structures are already cleaned and prepared, so it pairs directly with our guide on how to prepare a protein and ligand for docking and our AutoDock Vina tutorial for beginners. It sits inside our pillar guide on how to learn molecular docking, a key stop on the computational biology skills roadmap.
What is PyRx and why use it for docking?
PyRx is a virtual screening tool that bundles several docking programs behind one graphical interface. Under the hood it can run both AutoDock Vina and AutoDock 4, uses Open Babel to import and prepare small molecules, and ships with a built-in 3D viewer so you can see what you are doing at every stage. The canonical reference is the method chapter by Sargis Dallakyan and Arthur J. Olson, “Small-Molecule Library Screening by Docking with PyRx” (Methods in Molecular Biology, vol. 1263, 2015, pp. 243-250), which describes the screening workflow the software was built around.
The appeal for beginners is simple: PyRx handles the file plumbing that trips people up in a pure command-line workflow. It converts ligands to the right format, organises your inputs into tables, and lets you draw the search box with your mouse instead of typing coordinates. Because the docking itself is still AutoDock Vina, your results are directly comparable to the command-line tool — you are using the same scoring function, just with a friendlier control panel.
One practical note before you start: PyRx 0.8 is the version most tutorials and courses use, and the one to install if you are following along here. Always download it from the official source to avoid tampered builds.
What do I need before I start?
You need three things ready: the software, a protein, and at least one ligand.
- PyRx installed. Download it from the official PyRx site and install the build for your operating system. It runs on Windows, macOS, and Linux.
- A protein (the receptor). Download an experimental structure from the RCSB Protein Data Bank using its four-character PDB ID (for example,
1HSG), and clean it first — remove water and unwanted heteroatoms, add hydrogens, and save it as a PDB or PDBQT file. - A ligand (the small molecule). Get a 3D structure from PubChem as an SDF file, or extract a co-crystallised ligand from your protein’s own PDB file.
PyRx will do the final ligand conversion for you, but it is not a substitute for proper structure preparation. If you have not cleaned the protein and generated sensible 3D coordinates for the ligand yet, work through preparing a protein and ligand for docking first — the docking is only as trustworthy as the inputs.
How do I dock in PyRx step by step?
The full run has six stages. Follow them in order and PyRx walks you through the rest with its Vina Wizard.
- Load the protein as a macromolecule. Use File → Load Molecule to import your cleaned protein. It appears in the Navigator panel. Right-click it and choose Load as Macromolecule (or “AutoDock → Make Macromolecule”). PyRx adds charges and converts it to the PDBQT receptor format automatically.
- Import your ligand(s). Switch to the Open Babel tab and use Insert to load your ligand SDF or PDB files. You can load many at once for screening, or a single ligand for a first run.
- Minimise and convert the ligands. In the Open Babel tab, click Minimize All to clean up the ligand geometry, then right-click and choose Convert All to AutoDock Ligand (pdbqt). This adds charges, defines rotatable bonds, and writes each ligand to PDBQT — the format Vina reads.
- Open the Vina Wizard. Go to the Vina Wizard tab and click Start. Select your macromolecule and your ligand(s) from the lists, then click Forward to move to the next screen.
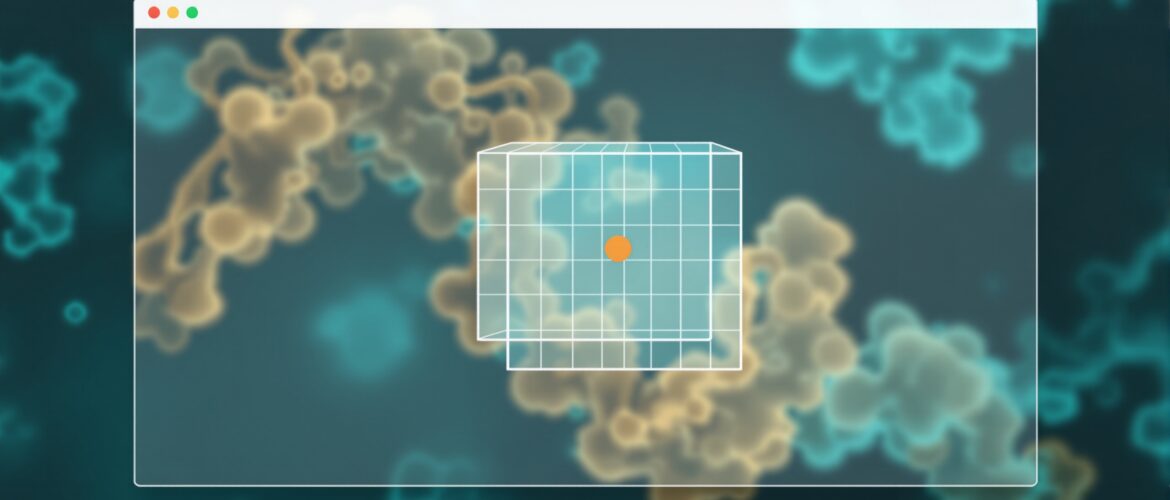
- Set the grid box (the search space). A 3D box appears in the viewer. Drag and resize it so it surrounds your known binding pocket; for an exploratory “blind” dock, use Maximize to cover the whole protein. The box defines where Vina is allowed to search — a tight box around the real site gives faster, more focused results.
- Run AutoDock Vina. Click Forward to launch the job. Vina searches for binding poses and, when it finishes, PyRx shows a results table of predicted poses with their binding affinities.
That is the entire workflow — no terminal, no config files written by hand. The grid box step is the one beginners most often get wrong, so it is worth slowing down there: too large a box wastes search effort, while a box that misses the pocket guarantees a meaningless result.
Want the guided, hands-on version?
Our live Molecular Modeling & MD Simulations cohort bootcamp takes you from zero to running real docking and MD workflows, with a portfolio project for your grad-school applications.
How do I read PyRx’s binding affinity results?
When the run finishes, PyRx fills the Analyze Results table. Each row is a predicted binding pose, and the key column is binding affinity, reported in kilocalories per mole (kcal/mol). The values are negative, and more negative means stronger predicted binding — so the pose at the top of the list, with the lowest (most negative) number, is Vina’s best guess at how your ligand binds.
Two extra columns, RMSD lower bound and RMSD upper bound, describe how far each pose sits from the top-ranked one; the best pose always shows 0. You can select a pose to display it in the viewer and inspect how the ligand sits in the pocket. PyRx lets you export the whole table to a CSV file, which is handy when you are comparing many ligands.
Treat the numbers as a ranking, not an exact measurement. The accepted way to trust a setup is a re-docking control: if you dock a known ligand back into its own crystal structure, the top pose should reproduce the experimental binding mode to within a root-mean-square deviation (RMSD) of 2.0 Angstrom — the standard accuracy benchmark used across the docking literature. If your control passes, you can have more confidence in predictions for new molecules on the same target.
PyRx vs the command-line tools — which should a beginner use?
PyRx is not a different docking method; it is a more comfortable way to drive the same engines. Here is how it compares with the command-line and classic GUI routes.
| Tool | Interface | Docking engine | Best for |
|---|---|---|---|
| PyRx | Graphical, wizard-driven; draw the box with the mouse | AutoDock Vina & AutoDock 4 | Beginners; screening a small library without scripting |
| AutoDock Vina (command line) | Text config file + terminal | AutoDock Vina | Reproducible, scriptable runs and large automated screens |
| AutoDockTools (MGLTools) | Graphical, but more manual setup | AutoDock 4 & Vina | Learning the underlying prep steps in detail |
For a first project, start in PyRx to get a clean, complete docking run under your belt. Once you understand each step, move to the command-line Vina workflow — it is what you will want for reproducibility and for screening larger libraries, and it makes your method easy to describe in a thesis or paper.
It is worth remembering why Vina sits behind all of these tools. In the original method paper, Oleg Trott and Arthur J. Olson (Trott & Olson, 2010) report that Vina “achieves an approximately two orders of magnitude speed-up compared with the molecular docking software previously developed in our lab (AutoDock 4), while also significantly improving the accuracy of the binding mode predictions.” PyRx gives you that speed and accuracy through a beginner-friendly door.
What are the most common PyRx mistakes?
- Forgetting to convert the protein to a macromolecule. If you skip the Make Macromolecule step, PyRx has no prepared receptor to dock against.
- Not minimising or converting ligands. Ligands must be energy-minimised and converted to AutoDock ligand (PDBQT) before the Vina Wizard can use them.
- A grid box that misses the pocket. If the box does not enclose the binding site, every result is meaningless — check it in the viewer before running.
- Reading the affinity backwards. Lower (more negative) is stronger. The most negative value is the best pose, not the worst.
- Docking unprepared structures. PyRx tidies ligands, but it will not fix a protein full of water or a ligand with no hydrogens — prepare your inputs first.
Frequently asked questions
Is PyRx free to use?
PyRx 0.8 — the version used in most tutorials and student projects — is freely available from the official site, and is the build to install if you are following this guide. Always download it from the official source rather than third-party mirrors.
Does PyRx use AutoDock Vina or AutoDock 4?
Both. PyRx can drive AutoDock Vina and AutoDock 4. The Vina Wizard described here runs AutoDock Vina, which is the faster and more beginner-friendly of the two for most docking tasks.
What units are the binding affinity scores in?
Kilocalories per mole (kcal/mol). The values are negative, and a more negative number indicates stronger predicted binding. Use them to rank poses and ligands rather than as exact experimental binding energies.
Can I screen many ligands at once in PyRx?
Yes. That is exactly what PyRx was designed for — you can load and convert a whole set of ligands in the Open Babel tab, select them all in the Vina Wizard, and dock them against one receptor in a single run, then sort the results table by affinity.
Do I need to prepare my files before importing them into PyRx?
Yes for the protein, and partly for the ligand. Clean and add hydrogens to the protein beforehand; PyRx will handle the final ligand minimisation and PDBQT conversion, but it expects a sensible 3D starting structure.
Your next step
Run the whole pipeline once on a well-known complex — load the receptor, convert a ligand, draw the box around the pocket, and dock — then re-dock the native ligand as a control to confirm your setup reproduces the crystal pose. Once that round-trip works in PyRx, you understand every stage of a docking job.
From here, learn the command-line version in our AutoDock Vina tutorial for beginners, tighten up your inputs with our guide to preparing a protein and ligand for docking, and use the molecular docking pillar guide and the wider computational biology skills roadmap to plan what comes next.
Want the guided, hands-on version?
Our live Molecular Modeling & MD Simulations cohort bootcamp takes you from zero to running real docking and MD workflows, with a portfolio project for your grad-school applications.
Written by the StemSkills Lab team — computational scientists with 10+ years of combined experience in sequence and structural bioinformatics, drug discovery and design, and multiscale molecular modeling.